Skip navigation, go to main content
Restorative dentistry

Dental implants

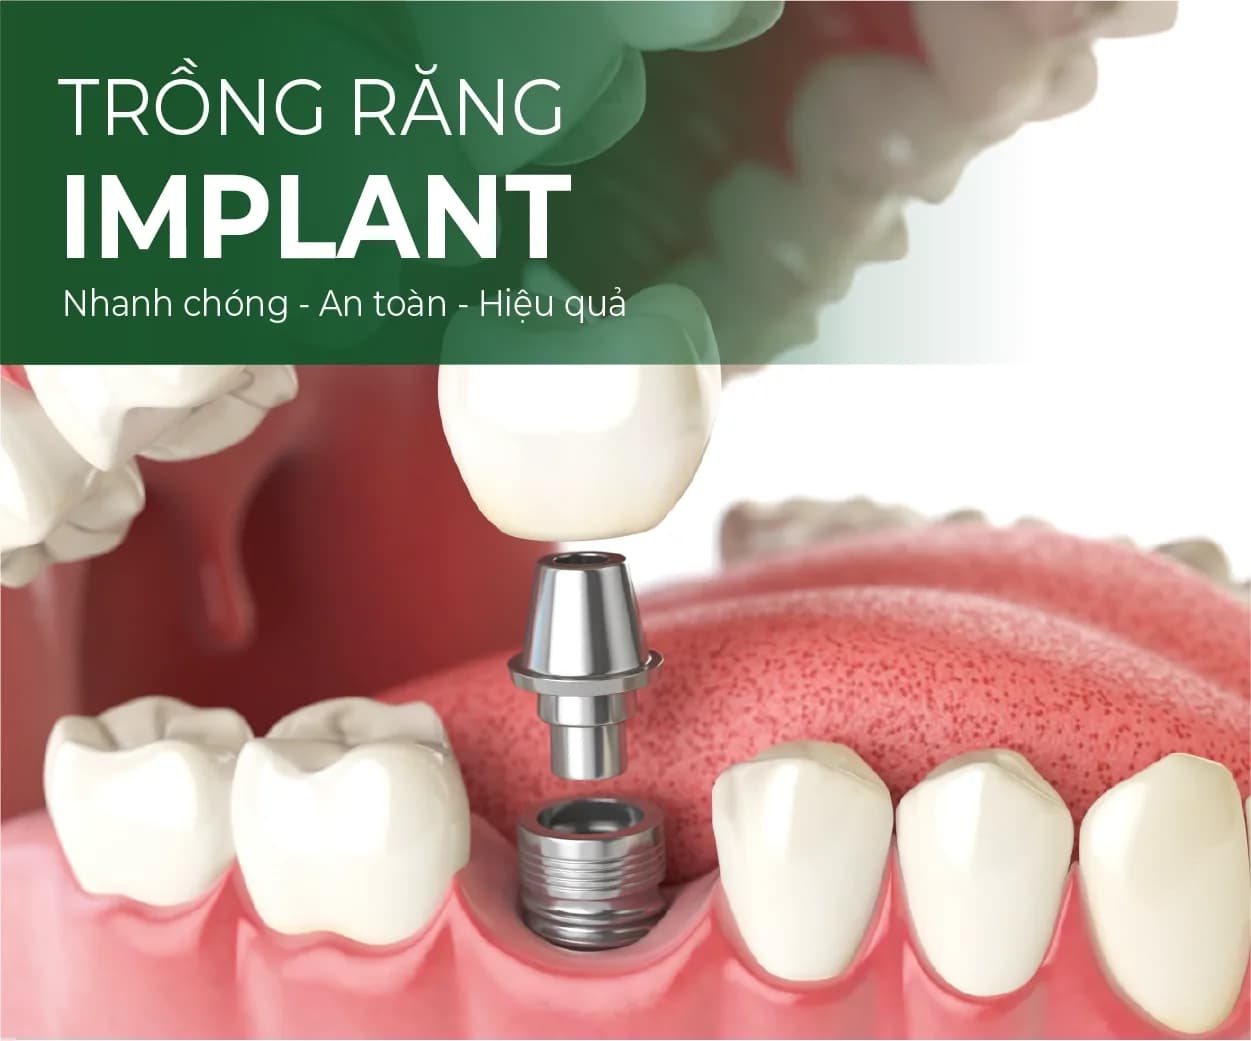
An implant is a titanium fixture placed into the jawbone to replace a lost tooth root, with a ceramic crown restored on top. It is the only method that loads the jawbone directly, which is why it prevents the bone resorption and gum recession that continue underneath a bridge or a denture.

Indicative cost

2,200,000 38,000,000 per fixture

Duration
3 – 6 months, including osseointegration
Appointments
3 – 5 appointments
Anaesthetic
Local anaesthetic or sedation
Warranty
Lifetime on genuine implant fixtures
Dental implants at Dental Việt Nam

Dental implants at Dental Việt Nam costs from 2,200,000₫ to 38,000,000₫ per fixture, takes 3 – 6 months, including osseointegration, and is warranted for lifetime on genuine implant fixtures. Prices include VAT and are the same at every clinic; the initial examination and panoramic X-ray are free. It suits patients with one missing tooth, several missing teeth, or a full arch and not wanting to prepare the two neighbouring teeth for a bridge.

Who this is right for

  1. One missing tooth, several missing teeth, or a full arch
  2. Not wanting to prepare the two neighbouring teeth for a bridge
  3. A removable denture that feels bulky or moves when eating
  4. Long-standing tooth loss where bone has started to resorb and the face is changing shape

Who should not have this

  • Pregnancy, or being under 18 with a jaw that is still developing
  • Uncontrolled diabetes, bleeding disorders, or ongoing radiotherapy to the jaw
  • Heavy smoking — failure rates are markedly higher

If you fall into this group, the dentist will propose a more suitable option rather than proceeding anyway. It is exactly why the first appointment always includes an X-ray.

The clinical detail

What to understand before deciding on Dental implants

Three points a dentist usually ends up explaining in the chair — read them first and your consultation can get straight to the point.

Osseointegration is a biological process, not a countdown

An implant fixture is not "screwed into" bone the way a screw goes into a wall. After placement, bone-forming cells migrate to the fixture surface and lay down new bone directly onto the titanium — this is osseointegration, and it takes the time biology takes. Paying more does not shorten it.

How fast it happens depends on the bone density at the site. Dense bone in the lower front jaw (types D1 – D2) is usually stable after 2 to 3 months. The softer bone in the upper back jaw (types D3 – D4) needs 4 to 6 months. So two patients with the same brand of fixture can be given crown appointments months apart — that is a difference in bone, not in service.

Before the crown goes on, fixture stability should be measured with a dedicated device rather than judged by hand feel and elapsed time. Only a sufficiently high stability reading justifies loading it. Putting a tooth onto a fixture that has not finished integrating is the shortest route to losing the whole case.
Peri-implantitis — the most common complication, and the least discussed

An implant cannot decay, and that leads many people to assume it is immune to everything. In fact the tissue around an implant is more vulnerable than the tissue around a natural tooth: a natural tooth has a periodontal ligament with its own blood supply and a ring of fibres attaching around the neck, whereas around an implant the fibres run lengthways only and resist bacteria far less well.

So when plaque accumulates at the neck of the fixture, inflammation travels down to the bone faster and usually without pain — the patient only notices once the fixture is loose, by which point a lot of bone has gone. This is why an implant with a lifetime warranty can still fail: the warranty protects you against a material defect, not against plaque.

Prevention comes down to three things: cleaning around the neck of the fixture daily with implant-specific floss or a water flosser, six-monthly maintenance using instruments that do not scratch the titanium surface, and an annual X-ray to compare the bone level against the film taken right after placement.

Where the fixture goes is decided by the crown it will carry, not by where the bone happens to be thickest

Modern implantology works backwards from the result: first the final tooth is designed, and only then is it determined where the fixture must sit, at what angle and at what depth to support that tooth along the line of chewing force.

Doing it the other way round — placing wherever the bone is thickest because it is easier — produces a fixture off-axis. The crown then has to be built out to compensate, which puts a twisting load on the fixture, creates a ledge that traps food, and in the front of the mouth makes an acceptable aesthetic result nearly unachievable.

This is the entire reason for the Cone Beam CT, the software planning and the printed surgical guide. The guide turns a plan on a screen into a drill in the right place in the mouth, with far less deviation than free-hand placement.

What is different here

How we do Dental implants

Prevents jawbone loss

The titanium fixture transmits chewing load into the bone the way a natural root does, so the bone is maintained and the face does not hollow.

Leaves neighbouring teeth alone

Unlike a bridge, which requires preparing the two adjacent teeth as abutments, an implant stands independently in the bone.

Placed through a 3D-printed surgical guide

Cone Beam CT, software planning and a printed guide — placed in the right position, at the right depth, with less surgical trauma.

Genuine fixtures with a traceability code

Every fixture arrives with a seal and a barcode you can check against the manufacturer's system before it is placed.

The process

6 steps

You know in advance what happens and how long each stage takes.

Before you come in

Eat something light before you come — do not arrive on an empty stomach, as the procedure takes time and low blood sugar makes faintness more likely. Bring your current prescriptions and your most recent health check if you have diabetes, high blood pressure or take anticoagulants; those medicines must be cleared by your physician first and never stopped on your own. Stop smoking at least 2 weeks before and 8 weeks after placement: it is the single biggest factor affecting success that is within your control. Arrange for someone to take you home if you choose sedation.

  1. 01

    Cone Beam CT and blood tests

    45 minutes

    Measuring bone density, height and width; blood tests to screen for contraindications.

  2. 02

    Digital planning

    1 – 2 days

    A 3D model is built, the fixture position planned in software, and a surgical guide printed for the placement appointment.

  3. 03

    Bone graft or sinus lift, if needed

    60 minutes

    Where bone is thin or the sinus sits low, grafting is done first and left 3 to 6 months to consolidate.

  4. 04

    Implant placement

    20 – 40 minutes per fixture

    Surgery in a dedicated sterile suite, the fixture placed through the guide, sutured, and a review appointment made.

  5. 05

    Osseointegration

    2 – 4 months

    The fixture and bone bond biologically over 2 to 4 months. A temporary tooth is fitted for function and appearance in the meantime.

  6. 06

    Abutment and ceramic crown

    2 appointments

    Impressions, the crown made over the fixture, bite checked, and your lifetime warranty card issued.

Aftercare

What to do at each stage

Most complications do not come from the treatment itself but from the days that follow. This is the guidance you are given when you leave.

First 48 hours

Do

  • Cold compress on the cheek, 15 minutes each hour on the first day, to limit swelling
  • Cool, soft or liquid food, chewing away from the surgical site
  • Take the full course of prescribed medication, even if it does not hurt
  • Sleep with your head raised

Avoid

  • Rinsing vigorously, spitting, or using a straw — all dislodge the blood clot
  • Smoking and alcohol
  • Strenuous exercise, bending forward, saunas
  • Touching the site with your tongue or fingers

Weeks 1 – 2

Do

  • Switch to warm compresses from day three if swelling persists
  • Brush normally elsewhere, using an ultra-soft brush around the surgical site
  • Attend the suture removal and healing check as scheduled

Avoid

  • Chewing on the treated side
  • Stopping the antibiotics part-way through
  • Wearing an old denture that presses on the site before the dentist has adjusted it

During integration

Do

  • Chew gently, increasing firmness gradually as instructed
  • Keep the area around the temporary tooth scrupulously clean
  • Attend review appointments so fixture stability can be checked

Avoid

  • Missing appointments because nothing hurts — this is the quietest phase of the whole process
  • Going back to smoking before the fixture has integrated

After the crown, long term

Do

  • Implant-specific floss or a water flosser at the neck of the fixture daily
  • Six-monthly review, with an annual X-ray to check the bone level
  • A night guard if one was prescribed

Avoid

  • Steel scaler tips used directly on the fixture neck — say that you have an implant if you have a scale and polish elsewhere
  • Biting hard objects with the implant, since a fixture has no ligament and you cannot feel the force the way you can with a natural tooth
Cost

Dental implants price list

Promotional price per fixture. 100% genuine implants, each fixture checked before placement.

Prices include VAT. The final cost depends on your specific case, is fixed in writing after the examination, and does not change part-way through.

Dental implants prices at Dental Việt Nam

  • Biotem implant2,200,000₫ per fixture

    Origin: South Korea

  • Osstem implant4,900,000₫ per fixture

    Origin: South Korea

  • MIS C1 implant12,000,000₫ per fixture

    Origin: Germany

  • Anthogyr implant12,000,000₫ per fixture

    Origin: France

  • Hiossen implant15,000,000₫ per fixture

    Origin: USA

  • Dentium implant20,000,000₫ per fixture

    Origin: USA

  • Neodent implant30,000,000₫ per fixture

    Origin: Switzerland

  • Bone graft, autogenous or synthetic5,000,000₫ per site

  • Closed sinus lift8,000,000₫ per site

  • Open sinus lift12,000,000₫ per site

Five things that decide the final figure

  1. The implant system and its surface treatment

    The spread from 12 to 38 million₫ mostly sits here. Long-established systems such as Straumann and Nobel Biocare cost more because they have long-term clinical follow-up data, surface treatments that integrate faster, and components that stay available — which matters when you need one replaced 15 years from now.

  2. Whether you need a bone graft or a sinus lift

    The longer a tooth has been missing, the more bone has gone. Grafting is charged by site, and closed and open sinus lifts differ substantially in cost. Only a Cone Beam CT can answer this, so any quote given before that scan is an indication, not a price.

  3. How many fixtures and what goes on top

    A full arch does not need 14 fixtures. All-on-4 and All-on-6 use 4 to 6 angled fixtures to carry a whole arch, at a far lower total cost than replacing every tooth individually.

  4. The crown and the abutment connection

    A zirconia crown on a titanium abutment is the standard choice. A custom abutment shaped to the individual gum contour costs more but gives a markedly better aesthetic result at the front of the mouth.

  5. Digital workflow and sterilisation

    A 3D-printed surgical guide, a dedicated operating suite and Class B autoclave sterilisation are fixed costs per case. This is not the place to economise: an infection during implant surgery costs many times more to deal with than the amount saved.

Comparing the options

Implant, bridge or removable denture?

Three ways to replace a missing tooth. The core difference is not how they look but that only an implant transmits chewing load into the jawbone — under the other two, the bone carries on resorbing.

Implant, bridge or removable denture?
CriterionDental implantPorcelain bridgeRemovable denture
Prevents jawbone lossYes — the single biggest differenceNo, bone under the pontic still resorbsNo, and it accelerates resorption
Effect on neighbouring teethNoneTwo healthy teeth must be prepared as abutmentsClasps can wear and loosen the supporting teeth
Chewing force vs a natural toothAbout 90 – 100%About 60 – 70%About 30 – 40%
Time to complete3 – 6 months5 – 7 days7 – 10 days
LifespanFixture can be permanent, crown 10 – 15 years7 – 10 years3 – 5 years
Initial costHighestMiddleLowest

The dentist's conclusion

Over a 20-year horizon an implant is usually the cheaper option despite the highest initial cost, because the other two have to be remade repeatedly and each remake costs more tissue. A bridge still makes sense when the two neighbouring teeth are already damaged and need crowning anyway. A removable denture suits patients missing many teeth, those with a contraindication to surgery, or as an interim solution while waiting to become a candidate for implants.

Risks

Possible complications and how they are prevented

No medical technique carries zero risk. What makes the difference is knowing in advance where the risk sits and controlling it with a specific protocol.

The fixture fails to integrate and has to be removed

Cause
Bone overheated during drilling, insufficient primary stability, smoking, uncontrolled diabetes, or post-operative infection.
Prevention
Drilling with irrigation at the recommended speed, screening for medical conditions and smoking before scheduling, and prophylactic antibiotics where indicated. A fixture that fails within the warranty period is replaced free of charge once the bone has healed.

Peri-implantitis and bone loss around the fixture

Cause
Plaque at the neck of the fixture, cement left behind when the crown was fitted, or a crown designed with no space to clean underneath.
Prevention
Prefer screw-retained crowns over cemented ones where the position allows; design the crown with cleaning access; review and take an annual X-ray to track the bone level.

Persistent numbness of the lip or chin

Cause
The fixture placed too close to, or into, the inferior alveolar nerve canal in the lower jaw.
Prevention
A Cone Beam CT is mandatory to measure the distance to the nerve canal and maintain a safety margin of at least 2mm, with a surgical guide controlling drilling depth.

Perforation of the maxillary sinus membrane

Cause
Placing a long fixture where there is not enough bone height in the upper back jaw, or lifting the sinus too aggressively.
Prevention
Measure the bone height below the sinus on the pre-operative scan; choose a closed or open sinus lift according to the bone actually available rather than by habit.

A fractured crown or a loose screw on the fixture

Cause
Chewing load distributed incorrectly, grinding, or a screw not tightened to the manufacturer's specified torque.
Prevention
Tighten with a torque wrench to specification; check the bite at review appointments; provide a night guard for patients who grind.
Frequently asked

Questions about Dental implants

Placing a single fixture usually takes 20 to 40 minutes under local anaesthetic, with no pain during the procedure. There may be mild swelling for 2 to 3 days afterwards, which is well controlled with medication and cold compresses as instructed.

Book today,
and find out exactly where your teeth stand

A dentist examines you, takes a panoramic X-ray and explains what it shows using your own images. Free, even if you decide not to go ahead.

Open Monday – Sunday · 08:30 – 20:00 · Clinic in Hanoi

Zalo